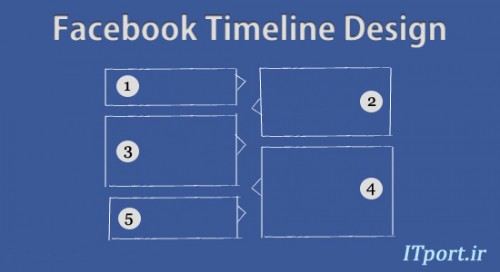
امروز قصد دارم در این پست توضیح ساده طراحی Timeline فیس بوک با استفاده از jQuery و CSS اجرا شده به شما یاد بدم مطمئنا Timeline انقلاب بزرگی در دنیای شبکه های اجتماعی است و احساس جدیدی به صفحات پروفایل کاربرها میدهد.
سعی کنید این دمو را با مرورگرهای مدرن مانند کروم، فایرفاکس و سافاری باز کنید (IE همچنان در خواب مانده و از همه عقبه شایدم مرده :دی).
برای دیدن دموی Timeline و دانلود کردنش به انتهای صفحه بروید.
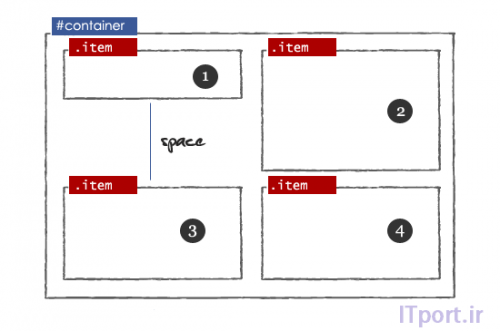
مرحله اول – چیدمان HTML
نخست باید عناصر DIV با ID ایجاد کنیید و مقدار کانتینر را مشخص کنید. این لایه شامل چند عناصر DIV است که دارای ویژگی کلاس value می باشد.
HTML
<div id=”container”>
<div class=”item”>1</div>
<div class=”item”>2</div>
<div class=”item”>3</div>
<div class=”item”>4</div>
</div>
چینش معمولی CSS
CSS
#containerwidth:860px; margin: 0 auto;
.item
width: 408px;
margin: 20px 10px 10px 10px;
float: left;
background-color:#ffffff;
border:solid 1px #B4BBCD;
min-height:50px;
text-align:justify;
word-wrap:break-word;
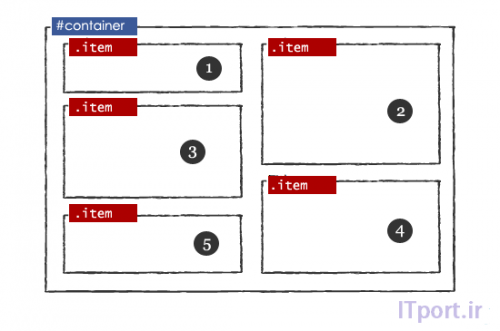
مرحله ۲ – اجتناب از فضاهای
از پلاگین jQuery Ma
پس از استفاده از پلاگین jQuery Masonry
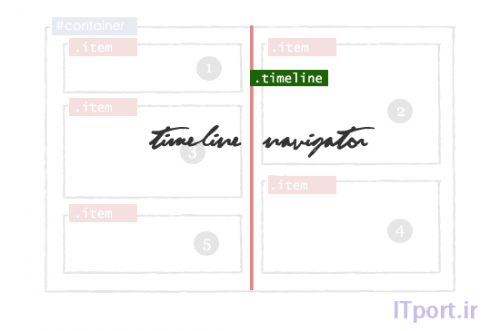
مرحله ۳ – گاهشمار Navigator
اکنون جدول زمانی _ کانتینر عنصر DIV را داخل ظرف DIV ایجاد می کنیم. این لایه شامل DIV کلاس ویژگی عنصر جدول زمانی value و plus است.
HTML
<div id=”container”>
// Timeline Navigator
<div class=”timeline_container”>
<div class=”timeline”>
<div class=”plus”></div>
</div>
</div>
<div class=”item”>1</div>
——–
——–
</div>
جاوا اسکریپت
$(“.timeline_container”).mousemove(function())- timeline_container
نام کلاس از تگ DIV جدول زمانی هدایتگر است. با استفاده از
$(‘.plus’).css()
استفاده از تصویر پس زمینه به سبک plus.png
$(‘.timeline_container’).mousemove(function(e)
var topdiv=$(“#containertop”).height();
var pag= e.pageY – topdiv-26;
$(‘.plus’).css(“top”:pag +”px”, “background”:”url(‘images/plus.png’)”,”margin-left”:”1px”);).
mouseout(function()
$(‘.plus’).css(“background”:”url(”)”);
);
Timeline Navigator CSS
.timeline_container
width: 16px;
text-align: center;
margin: 0 auto;
cursor:pointer;
display: block;
.timeline
margin: 0 auto;
background-color:#e08989;
display: block;
float: left;
height: 100%;
left: 428px;
margin-top: 10px;
position: absolute;
width: 4px;
.timeline:hovercursor: pointer;margin: 0 auto;
.timeline div.pluswidth: 14px;height: 14px;position: relative;left: -6px;
مرحله ۴ – تزریق امتیاز فلش
جالب ترین بخش، یافتن
$(‘#container’).find(‘.item’)
موقعیت div و تزریق فلش اگر موقعیت ۰px
rightCorner else leftCornet
function Arrow_Points()
var s = $(‘#container’).find(‘.item’);
$.each(s,function(i,obj)
var posLeft = $(obj).css(“left”);
$(obj).addClass(‘borderclass’);
if(posLeft == “0px”)
html = “<span class=’rightCorner’></span>”;
$(obj).prepend(html);
else
html = “<span class=’leftCorner’></span>”;
$(obj).prepend(html);
);
![]()
CSS
.rightCorner
background-image: url(“images/right.png”);
display: block;
height: 15px;
margin-left: 408px;
margin-top: 8px;
padding: 0;
vertical-align: top;
width: 13px;
z-index:2;
position: absolute;
.leftCorner
background-image: url(“images/left.png”);
display: block;
height: 15px;
width: 13px;
margin-left: -13px;
margin-top: 8px;
position: absolute;
z-index:2;
مرحله ۵ – حذف بلوک
اضافه کردن common anchor برچسب کلاس حذف نام جعبه داخل آیتم DIV .
<div id=”container”>
<div class=”item”>
<a href=’#’ class=’deletebox’>X</a>
1
</div>
<div class=”item”>
<a href=’#’ class=’deletebox’>X</a>
2
</div>
———–
———–
———–
</div>
JavaScript
حاوی کد جاوا اسکریپت.
$(“.deletebox”).live(‘click’,function() – deletebox
نام کلاس anchor از برچسب (X) . با استفاده از $(this).attr(“id”) خواستار حذف value را کلیک کنید.
$(“.deletebox”).live(‘click’,function()
if(confirm(“Are your sure?”))
$(this).parent().fadeOut(‘slow’);
//Remove item block
$(‘#container’).masonry( ‘remove’, $(this).parent() );
//Reload masonry plugin
$(‘#container’).masonry( ‘reload’ );
//Hiding existing Arrows
$(‘.rightCorner’).hide();
$(‘.leftCorner’).hide();
//Injecting fresh arrows
Arrow_Points();
return false;
);
مرحله ۶ – وضعیت بالاپر
ایجاد یک عنصر پنجره DIV داخل ظرف DIV . این لایه شامل کادر id=’update’ و ورودی ID update_button
HTML
<div id=”container”>
<div class=”item”>1</div>
——–
——–
<div id=”popup” class=’shade’>
<div class=”Popup_rightCorner” > </div>
What’s Up?
<textarea id=’update’></textarea>
<input type=’submit’ value=’ Update ‘ id=’update_button’/>
</div>
</div>

JavaScript
$(“.timeline_container”).live(‘click’,function() – timeline_container
نام کلاس DIV عنصر جدول زمانی هدایتگر است. در اینجا بیش از حد همان چیزی را حذف کنید عمل ظرف DIVs دوباره تنظیم می شود با استفاده از پلاگین masonry و فلش تازه ایجاد می شود.
//Timeline navigator on click action
$(“.timeline_container”).click(function(e)
var topdiv=$(“#containertop”).height();
//Current Postion
$(“#popup”).css(‘top’:(e.pageY-topdiv-33)+’px’);
$(“#popup”).fadeIn(); //Popup block show
//Textbox focus
$(“#update”).focus();
);
//Mouseover no action
$(“#popup”).mouseup(function() return false);
//Outside action of the popup block
$(document).mouseup(function()$(‘#popup’).hide(););
//Update button action
$(“#update_button”).live(‘click’,function()
//Textbox value
var x=$(“#update”).val();
//Ajax Part
$(“#container”).prepend(‘<div class=”item”><a href=”#” class=”deletebox”>X</a>’+x+’</div>’);
//Reload masonry
$(‘#container’).masonry( ‘reload’ );
//Hiding existing arrows
$(‘.rightCorner’).hide();
$(‘.leftCorner’).hide();
//Injecting fresh arrows
Arrow_Points();
//Clear popup textbox value
$(“#update”).val(”);
//Popup hide
$(“#popup”).hide();
return false;
);
CSS
#popup
display: block;width: 408px;
float: left;margin-top:10px;
background-color:#ffffff;
border:solid 1px #A9B6D2;
min-height:60px;display:none;
position:absolute;margin:10px;
Download View Demo
sonry را برای تنظیم شکاف خالی استفاده می کنیم.
<script type=”text/javascript” src=”http://ajax.googleapis.com/
ajax/libs/jquery/1.5/jquery.min.js”></script>
<script type=”text/javascript” src=”jquery.masonry.min.js”/>
<script type=”text/javascript” >
$(function()
// masonry plugin call
$(‘#container’).masonry(itemSelector : ‘.item’,);
);
</script>
هیچ نظری موجود نیست:
ارسال یک نظر